
Bill and I recently shared the initial rundown of our DIY Wedding Decor and detailed 2 of the four zones we embellished. First, we shared the dining area, complete with thrift-ed milk glass. Then we highlighted how we chose to decorate the dance floor. We also noted that we invested a great deal of effort intwo other spaces – the reception’s grand entry, and the pool. Today we’re talking all things pool-floaty and awesome. Or, what Bill and I decided to deck the pool with.
When you google ‘wedding decorations pool’ or anything similar, you discover floating flowers and submersible lights, but not much that felt unique. At the time I was considering this, Taylor Swift made headlines appearing on her Instagram with a new beau. I couldn’t care less who she was dating, but thought the giant inflatable swan she was photographed riding with him on was pretty cool.

I thought placing giant inflated swans in the pool for the wedding would be whimsically entertaining. That was until I shared the idea while consulting with an OBX event designer I considered hiring. I discussed the idea and many others to get a quote on how this could be done. Not only did she quote me a ridiculous price for what I was planning, within 24 hours her site suddenly offered inflatable swan rentals for weddings. Needless to say I was pissed to see my somewhat novel idea now available for the masses. 😡😡😡 So I decided to nix the swans.

 This had promise, but I didn’t think floating triangles would be too exciting. Then I though about how much we love our initials (hence the name of the blog!) and I had an epiphany; what about FLOATING FLORAL INITIALS? To make them, we’d need to alter the instructions a bit from the pin above….

Yes, friends, we monogrammed the crap outta our wedding… And wouldn’t have it any other way 🙂
Making these beautiful monogram floating letters was not all that complicated.
For the basic construction You will need:
- Foam insulation sheeting to your desired size needs (we used something like this)
- Box cutter with blade long enough to break through the foam
- Sharpie
- Desired shape or word
- Plexiglass (optional)
Then to decorate the letters you’ll need:
- Hot Glue gun & glue
- Faux flower heads
- Foliage
- OR fabric
- OR contact paper
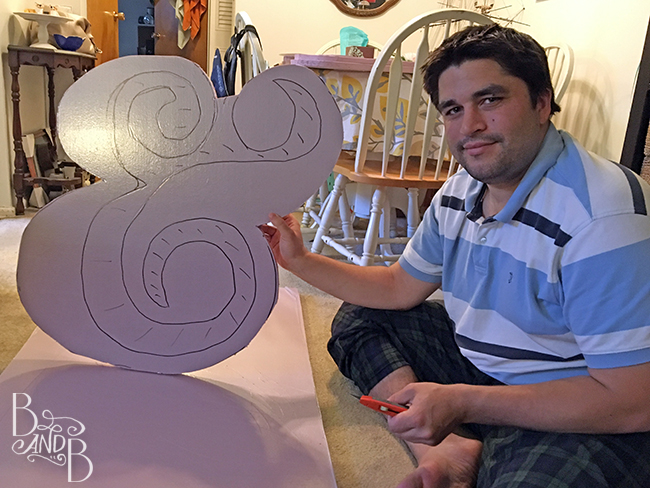
We used the same B&B that was designed for our Wedding Invitations. We decided to make the B’s about a yard high, and knowing that we used this tutorial to print the graphic across multiple pages using MS Paint that could be tiled to make one large image. We printed a big mess of pages that, when taped together, created the blown up version of our letters.

Once assembled, we placed the letters on the foam insulation sheeting, taped in place. Then, using the back end (blunt side, cap still on) of the sharpie, we traced around the outside of our letters, pressing into the foam. When we removed the paper template, the letters were traced into the foam, and we went over the tracing using the actual felt tip of the sharpie and marked out areas that were going to be removed, like the interior of the Bs.

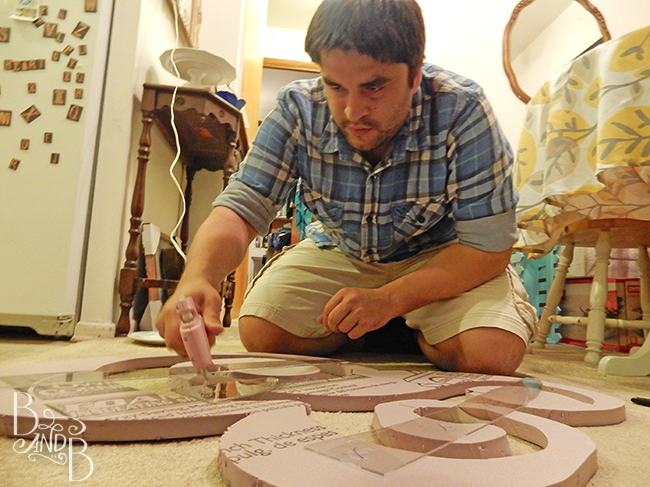
To cut the letters, first cut them down into smaller pieces to make it easier to work with them. Ensure you have either several layers of cardboard or spare foam sheet beneath your letters as you cut to protect your table or work surface from the cutting blade. Take your time, use firm, continuous pressure, and try to make your cuts long to keep your edges smooth.

If your letters are in multiple pieces, like a lowercase i, or if your character or shape is very curvy but might be a little fragile, like our ampersand, then you’ll want to add some strips of plexi to the back of them to add stability. ****This is also how you can attach them to eachother so they do not float out of order in the pool. We did NOT glue our letters to eachother until right before they were set into the pool. That way, they were 3 smaller pieces to transport, instead of a HUGE monogram we had to carefully get to the wedding. Just remember to PACK THE GLUE GUN so you’re ready to go at the pool. 🙂

Lay out the letter BACKWARDS – face down – and then layer the plexi slats over the letter. Mark the back of your letters where you want the plexi slat to lay (mark the edges) and also mark an X on the plexi slat where you plan to glue the slats to the letters.
Then glue away using a little hot glue.
Now you’re ready to decorate your letters!
As ours were intended to be pseudo floral arrangements, I used silk flower heads to cover the letters.
First, I colored the edges using a dark green marker — you *could* spray paint them too, but we were worried the paint might melt the foam (chemicals are weird) so we opted to do it the hard way with the marker instead.
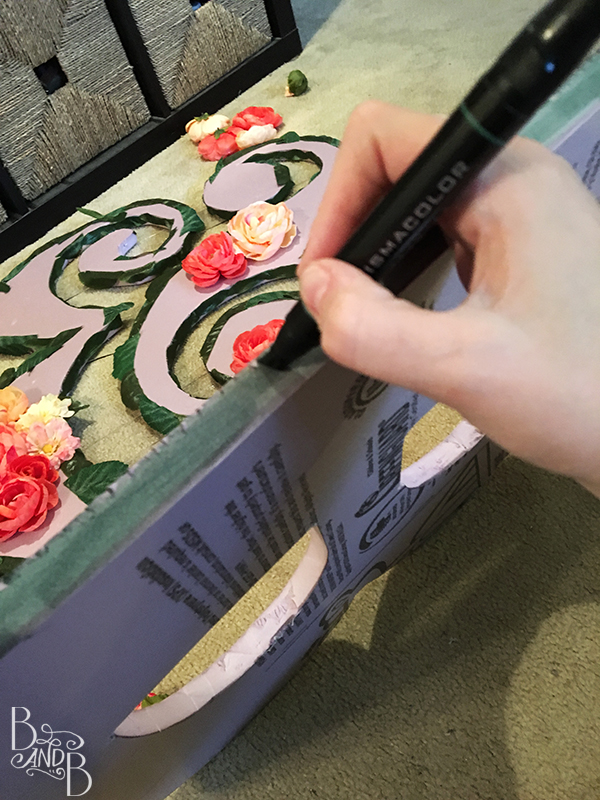
Once the edges were colored, I used foliage from the flowers to cover and further blend the edges of the letters, before beginning the floral layer.

Then I added my favorite flowers in thicker areas and worked out from those points as I glued the flowers in place.


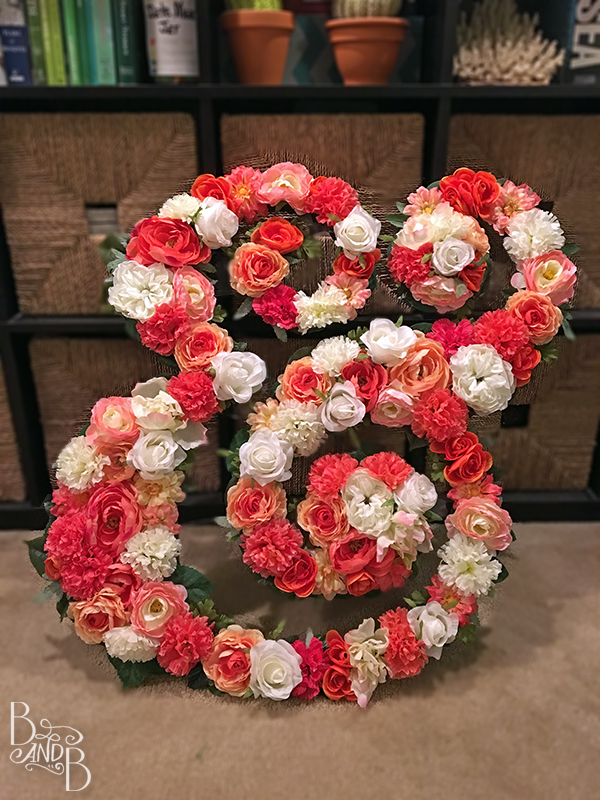
Once the flowers are all glued on, you’ll end up with something like this!
Now, before you pack the letters away to take to the pool – TEST THEM. We crossed our fingers that the Ampersand would float, but were pretty confident it would after testing a B in the bathtub….

Carefully pack away your letters to take to the pool — we used those little plastic ‘table’ things that pizza parlors use to keep boxes from collapsing, but instead we used them to keep the letters from smushing the flowers. You can also use toothpicks too.
Once the big day arrived, we added the last few slats of plexi to the backs so the letters aligned properly in the pool, then anchored them to a few milk jugs filled with sand at the bottom of the pool so they’d stay centered in the water.

And viola! Monogrammed pool decor!

These were one of the two details Bill & I were most proud of – our grand entrance takes the cake though! More details next week on that.
In the meantime, follow us on Instagram and Twitter to catch up on what we’re up to NOW and sneak peaks on what’s to be shared of our new apartment!
~ Beth


love! Were you able to find the flowers in bulk anywhere that was affordable? Ive had trouble…
I had the luxury of time on my side so I would pick up stems when I saw them marked down as I went. For the most part I got a few bouquet stems that were of a nicer quality and a bit larger, then used cheaper flowers to sort of fill in from there. By using bouquet bunches I was able to get a bit more variety that still went well together but added more texture than all the identical flower would create. And don’t forget to save the greenery from the stems to fill in with too!
Most were from Joann fabrics and hobby lobby, though I did find a bouquet at At Home For cheap too.