
So we’ve all seen the beautifully staged bookcases on Pinterest. The ones where everything is seemingly stashed in there but somehow looks perfect. Here’s one I’ve been ogling lately.

I really like look of how this one is styled. It really has some character behind it.
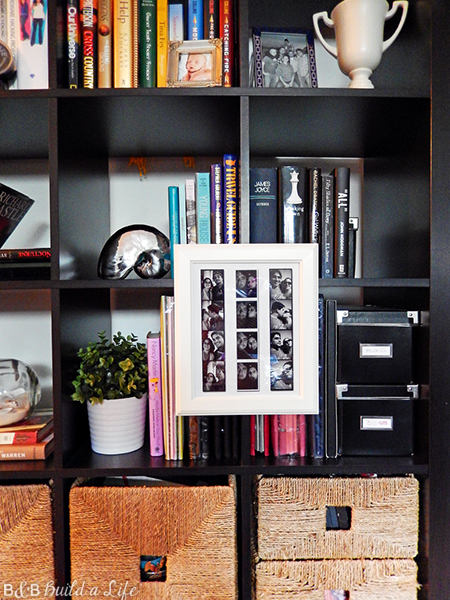
Now how about the artwork in front? When I first saw an example of this, it stuck out like a sore thumb to me. Just looking across someone’s library and then BAAM there’s a frame in the way. However, after some time I think this is a trend I am really starting to dig.
Why? Clutter. Because I have too much clutter.
As I have teased before, the biggest thing I brought with me from DC to Pittsburgh when Bill & I moved in together was the massive 5×5 cube Expedit bookcase. It’s something like 6′ tall and 6′ across and takes up a whole wall of our apartment. Of course I want it to look pretty being so massive in the room, but it still needs to hold stuff and function as a bookcase should, not just like a museum. As a result, some of those beautiful cubes on the shelf will be less pretty than I’d like.
This is especially true when it comes to stowing my scrapbooks. (Side note, after all that hard work putting a scrapbook together, you put it on a shelf and the binding is HIDEOUS. I’ve officially switched to photobooks online now. SO MUCH BETTER.)
My solution for making my miss-matched scrapbooks look neater on the shelf? Hanging artwork to cover them up. Yes, it’s the bookshelf equivalent to shoving things into the closet and then quickly closing the door before it falls out. Hah!
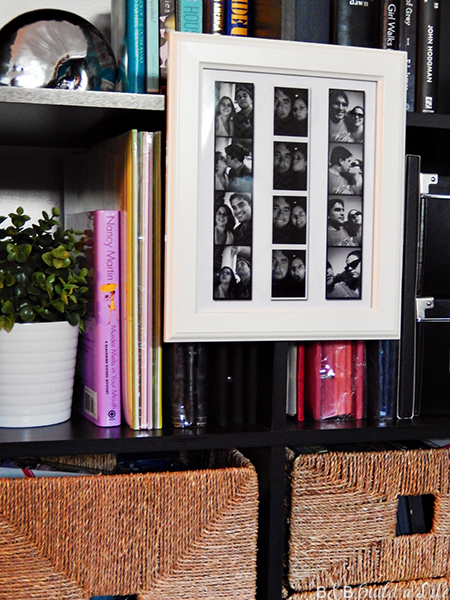
In this case I decided to use my second in a pair of as-is frames from Ikea (you already met the first when we added the shelf in our bathroom). The white frame doesn’t contrast as much with what’s in the frame, but it does pop against the dark tone of the bookcase really well.
In the frame I Photoshopped a few digital photo strips that Bill & I took on my phone using the app Pocketbooth. I simply offloaded the strips from my phone then arranged them on an 8×10 canvas in Photoshop. A handy little inexpensive art project for ya.
But HOW do you hang a picture frame on a bookshelf? Won’t it damage the shelf with a nail or hanger? NOPE. I even devised a way to easily be able to move the location of the frame on the shelf too. Here’s what you will need.
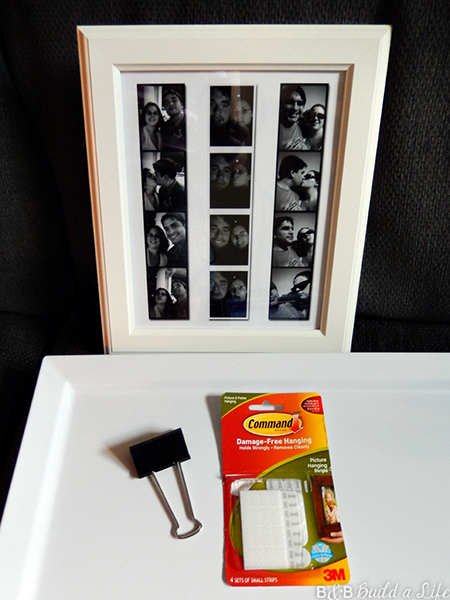
Find a binder clip that will easily clip over your bookshelf. Slightly bigger is better and will decrease the chances of it scratching.
Now, take one of the Command picture hanging strips and stick it on there. Straight up and down, diagonally across, it’s all up to you.
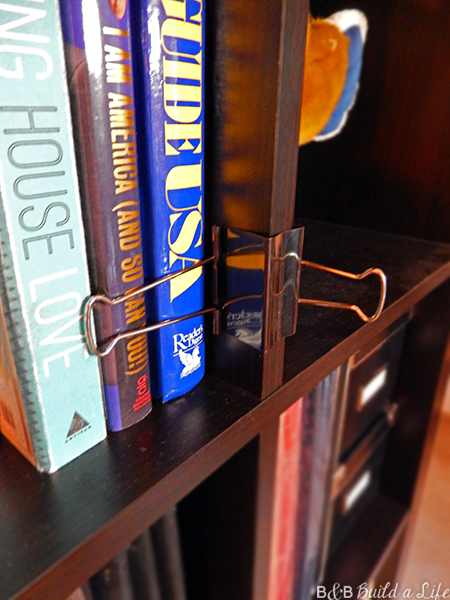
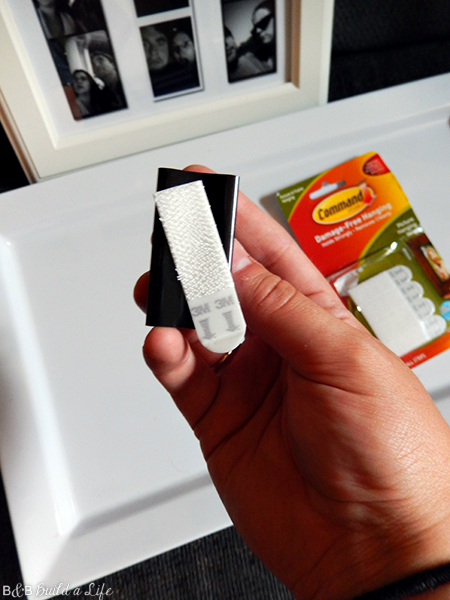 After the strip is on your binder clip, add your clip to the shelf where you want to hang your frame. Then, add a strip to the back of your frame and velcro them together like you normally would with the strips. You’re done!
Be smart with your use of this method. Big huge picture frames that have heavy artwork in them will NOT be safe to hang with a single clip like this. But you can always add more if the frame is large enough.
The nice part about using the binder clip method is that if I decide I want to use the frame elsewhere on the bookcase, I can simply unclip and move it without having to use another costly strip.

Can you see them? Behind the frame? Yup, those are my scrapbooks. I broke them up across two cubes so they would nicely hide behind the frame.
A little more of the bookcase revealed! There’s more surprises in this goliath-sized bookcase, so check back tomorrow for more!
~ Beth
Don’t forget to check out these other recent bookcase related projects!
 |
 |
|
| Pottery Barn Box Revamp | Of All The Gin Joints in This Town.. |
Related articles
- Four Creative Uses For Binder Clips (unclebobs.com)


3 thoughts on “Bookshelf Artwork”
Comments are closed.