
So as has been established, Bill and I moved in together. We took this little 1 bedroom apartment and made it fit two people’s stuff. It wasn’t terribly difficult, but it wasn’t easy either. The biggest challenge? Closet space.
 Though I’ve never showed it, the bedroom only has one closet. No big deal, but the only door is this accordion door. Though the closet runs the full width of the room making it pretty hefty in size, you can’t really reach most of it because of the tiny door. This is no bueno for a girl who likes shoes.
But there’s another closet in the hall. One with the same type of doors, but you can actually step into it, and there are a few built in shelves too! Promising, right?

There’s a catch though. Remember how tiny our kitchen is?
 Yeahhhh…. there’s only those 4 too-short-to-store-a-cereal-box cabinets across the top, plus 3 drawers to actually keep things in. So for the most part, there’s baking items, cups, plates and utensils kept there. But what about the food?
Yup, that’s right, the hall closet. But realistically only a family of 5 would ever need that full space for pantry storage alone, so using only one side of the closet for pantry items was plenty for us.
But how to make the best of the space? First step, add shelves.

As you can see in the photo above, there were shelves on either side that are about 3 feet wide, but all of the shelving was no nigher than the shelf just above the hanging bar. Doable, but that really meant that there was wasted space above. So instead we decided to take advantage of all the space we could and build upwards with an extra U of shelves with some leftover shelving materials my dad had in the garage. Gotta love free!
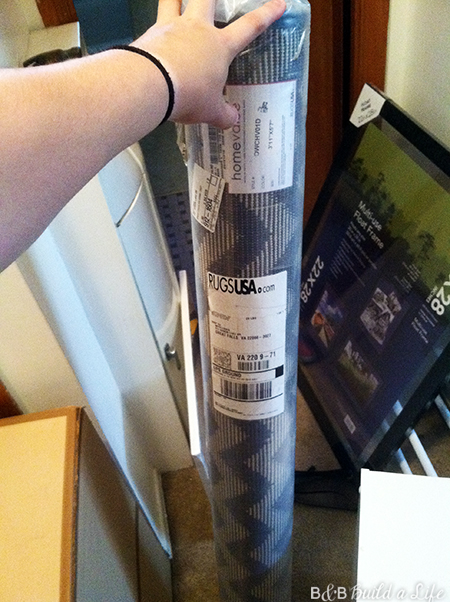
Then I remembered this gem. I picked it up through a Groupon deal for $30 after a friend shared it with me. 
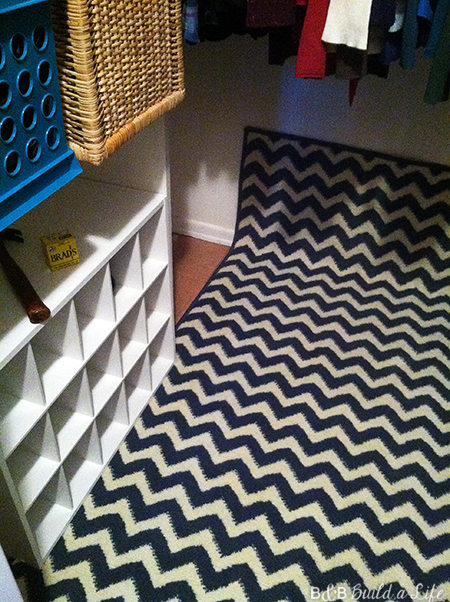
 Yup, it’s a chevron carpet! Now, really, do I need a chevron carpet in my closet? Noooo…. but given that we already have chevron curtains and pillows, I didn’t want to over-saturate things and the size was almost perfect for the closet. Bonus? The shelving on either side didn’t actually go all the way to the floor, which meant I could easily slide it underneath as if it was always there.
But how to make it fit?
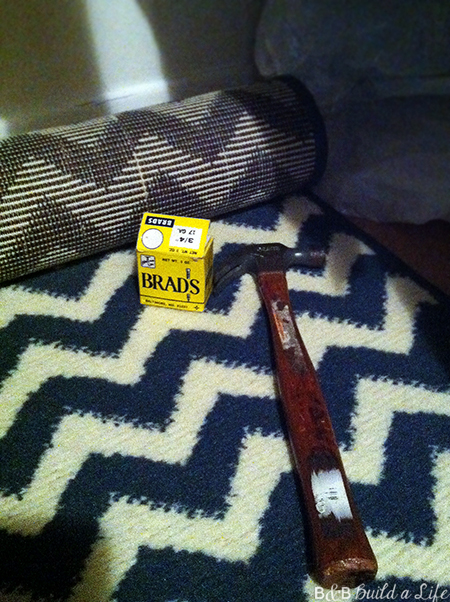
With a little tacking of course!
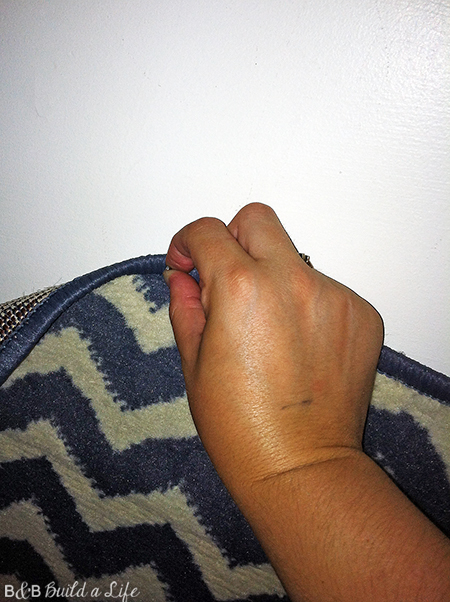
I lined up the carpet along the threshold of the door, and centered it within the closet. Then I added a row of brad nails along the floor boor to keep it down tight where the wall and floor meet, plus tacked it a few times across the top edge of the carpet as well. Worked like a charm!
Side note, see that handy white cubby on the left? It’s from closet maid. I thought it would make a great shoe organizer and would look built it. ….well, it LOOKED great. But I made the mistake of buying it on impulse before reading the reviews. Unless you only wear flats, or no more than kitten heels, DO NOT BUY IT. The cubbies are not tall enough to fit most heels, and really can’t even fit 2 shoes side by side either so it’s only good for the shoes that you are ok with smushing together… and at that point, just get a basket!
Ok, so now that we have carpeting…. we need things to actually store with, right?More on that later!
Beth


1 thought on “That Time When I Took Over The Closet”
Comments are closed.