
We’ve already shared with you most of our wedding signs, like our awesome shenanigans bar sign, and our I Spy photo game. Those signs were all designed in Photoshop then printed. Only one sign was actually hand painted, and it served as the welcome sign for our guests.

The thought process behind the sign was twofold; we wanted to obviously welcome our guests and direct them where to go, but we also wanted the sign to serve a purpose beyond our wedding day. Ideally we wanted to use the sign in our future home. So after plenty of inspiration and tutorials, I decided on an ‘Established’ sign that featured chevron, our custom monogram, and our wedding date.
For the sign, I originally planned to be SUPER-DIY-BRIDE-LADY and rip apart an old pallet to create the planked sign look. And then it was less than a week before the big day, so instead I cheated and bought one at Pat Catan’s. But you can find similar ones on amazon here.
The wood sign was unfinished, so I picked up a tube of the laziest, and seriously easiest stains I’ve ever used. It’s called Express Color by Minwax. I used the ‘Walnut’ shade, and they’re not kidding – the sign is easily a yard wide, and I had the whole thing wiped and coated in 10 minutes. And while I did let it dry overnight to be sure, it felt dry enough to paint on within about 45 minutes… would have been sooner but I was a little heavy handed in some spots.
To recreate our monogram on the sign, I used the graphite transfer method. I printed and pieced together our initials on paper. Then, I turned them over and grabbed an old school #2 pencil and let out my wedding planning frustrations on the paper. Yep, I scribbled like a mad woman all along the back side of the letters, leaving a layer of graphite all along the edges of our initials. (If you’d rather not rage on your page, you can use graphite transfer paper like Backyard Bungalow does here.) Once I was back in a more zen mood, I flipped the letters over face up, placed it on the board where I wanted them, and traced.

It’s hard to see the lines in the photo – they were just not showing up for the camera, but I traced in red where the line is so you can try and squint to see it in the left photo.
Once the monogram was transferred, I repeated the process to trace our wedding date on the sign above the initials, using the same sans serif font from our wedding invites.
Then it was a matter of hand painting in the letters. Verrrry carefully. Or, not so carefully as was the case of the B&B. Those I left roughly painted to mimic the letter-press style font they’re printed as.

Now, what about the chevron? Don’t kid yourself, I did not make my own chevron stencil. Nobody got time for that! I used a Plaid Folk Art brand stencil also bought at Pat Catan’s… but you can snag it CHEAPER on amazon.

I used a foam pouncer brush like this one on amazon. I had some handy in my craft stash, but a household sponge would have worked too. Heck, paper towels balled up would work… just depends on the texture and time you desire.
Now, you might be wondering where the whole ‘direction’ aspect of the sign comes in. Well, it’s quite fancy. I found this awesome Marquee arrow at target (No longer available) on clearance and knew it was going to find a home at our wedding. So I slapped some flowers that matched our pool monogram and hung it on the sign.

I was super pumped with how it turned out. B&B, Thataway! Then, to help stage things a little more near the sign, I also snagged a few lanterns (also from Target, now gone)….
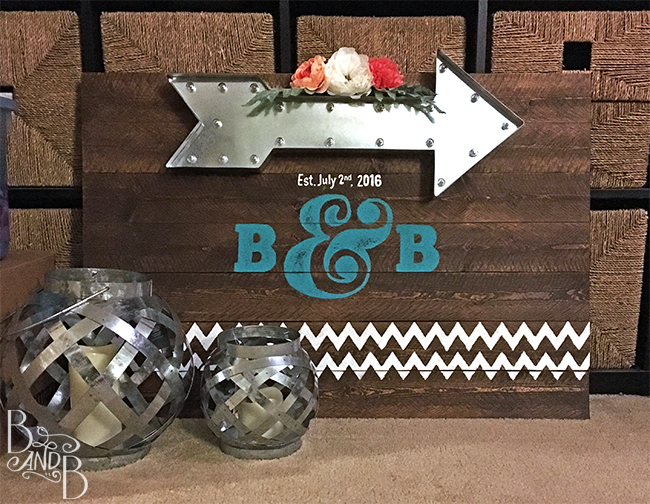
The arrow and the lanterns are all made of the same galvanized metal so it tied together great, and the lanterns set on the floor would help sort of visually ‘plant’ the sign in place. And THIS is what it looked like on the big day….

You might be confused right now. ‘Hey, but, Beth, the arrow is on the ground?!’
Lesson learned, be 1000000% clear with all of your decorations when handing them off to your event planner. Even when you say that the arrow goes on the sign, and think the bright red push pins wedged into the sign at exactly the same distance as the hanging loops on the arrow might seem to you as pretty obvious. D’oh!

In the end it was still beautiful and the third-most complimented decor element of the day. That’s after our floating monogram and the final piece in our dramatic grand entrance we created…. more on that next week!
Have you ever planned to do the full DIY and then bought most of the pieces?


2 thoughts on “DIY Wedding Welcome Sign IRL”
Comments are closed.